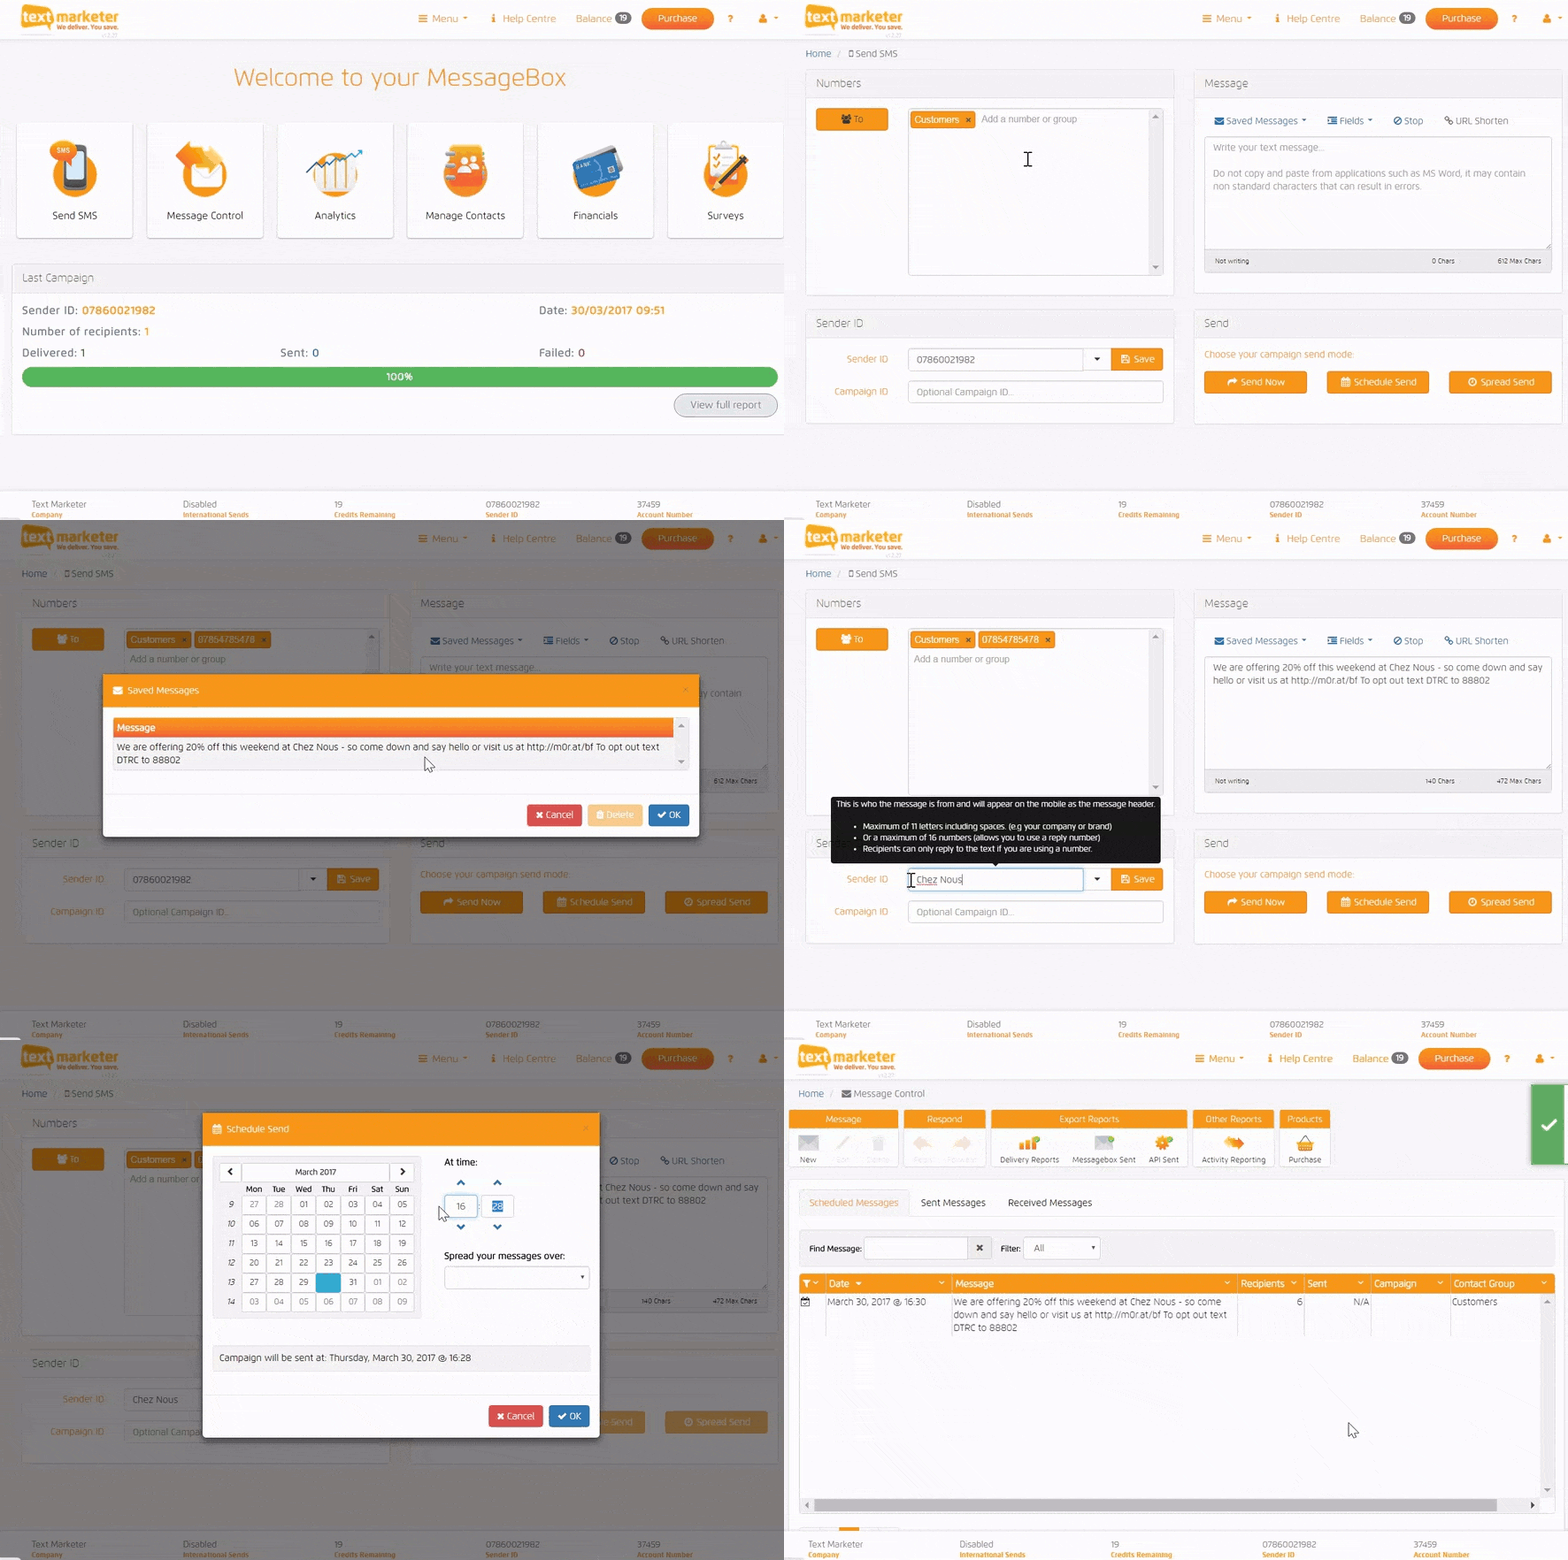
Sending SMS is easy with our new system Message Box, but here is a quick ‘How to’ just in case you need it.
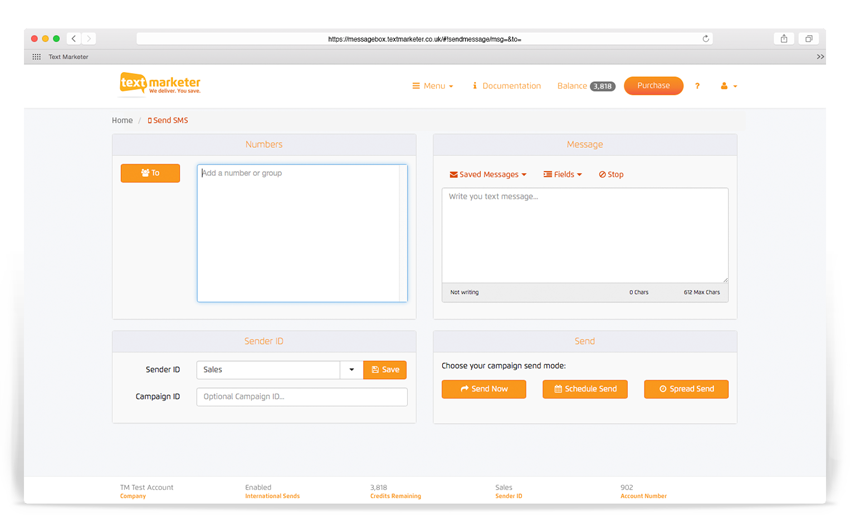
To start with you will need to sign up for a free account, then click on the ‘Send SMS’ button on the Message Box homepage, which will take you to the screen pictured above.
Once you have your account it takes less than 1 minute to send a message, don’t believe us, take a look at the video below.
Entering your numbers and/or contacts
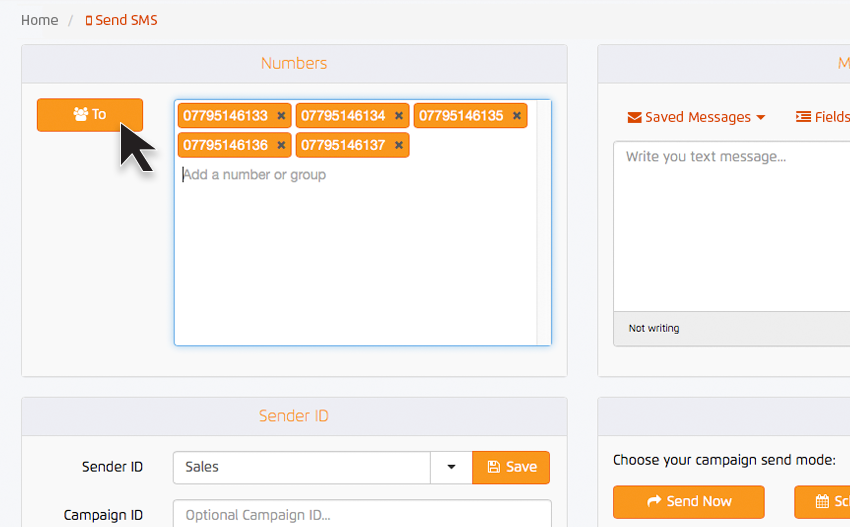
On the left you will see a box labelled ‘Numbers’, this is where you put all the mobile phone numbers you want your message to go to.
You can copy and paste your numbers straight into this box or type them straight into the box, separating them either as a single column of numbers or separated by a comma. There is no limit to how many numbers you can send to.
If you already have contacts stored in your Message Box then simply click on the ‘To’ button situated to the left of the numbers box and select your chosen group/contacts.
Typing your message for the campaign
The box on the right of the screen, labelled ‘Messages’ is where you write your messages.
Do not copy and paste messages into here as applications tend to carry through hidden characters that are not excepted by mobile networks.
It is 1 credit per 160 characters with a maximum of 612 characters. At the bottom of the box you will see a credit counter which will change as you type and you can see exactly how many characters/credits you have used.
If you plan on sending this message again then simply click on the ‘Save to Message Library’ button above, to save it for another time.
Can people reply to the messages I send?
Yes, with every account at Text Marketer you get a Free Reply Number.
The bottom left box you will see is labelled Sender ID, click the drop down and select your Free Reply Number (it’s the standard 07……. style number). The replies you receive will be stored in your Inbox on the ‘Message Control’ page and replies will be sent straight to your email (which you can reply to by email and the message will go back as a text message – neat eh).
Replies can only be received from people you have sent messages to from your Messagebox account in the last 7 days. People cannot text you on this number if you haven’t sent to them previously. You can enable this functionality by ordering a paid for txtUs virtual mobile number.
How do I send a previously saved message from my Message Library?
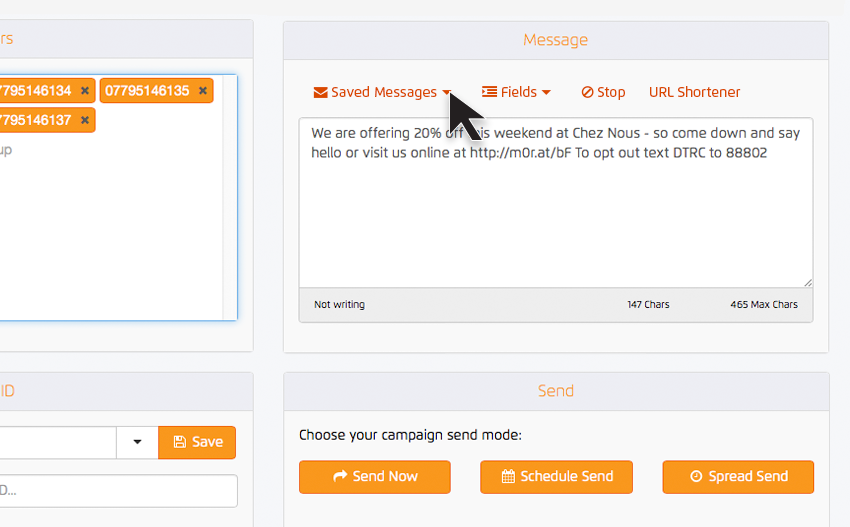
At the top of the Message box you will see the dropdown called ‘Saved Messages’ – here is where your saved messages are stored.
Click and a little pop up screen will appear with all your previously saved messages, select the one you need and then it will be automatically populated for you. You can still go in and edit the message if you need to.
Make your campaign personal, by personalising your messages
If you have stored contacts with their details on your Message Box then you can send personalised message campaigns out.
Situated at the top of the Message Box you will see a button called ‘Fields’. From this you can select several data fields, such as first name and city, but you can also create your own data fields.
A common tool is to send personalised messages out using the recipients name for example, you would type ‘Hello’ then click on the ‘Fields’ drop down and select ‘First Name’, then continue your message. So it would read, ‘Hello (First Name) we have an offer you might be interested in…’ Our system will then automatically insert their first name into that space for you, clever isn’t it!
Setting your Sender ID
You can set and change your Sender ID in the bottom left box, you will see an area where you can type into and also a dropdown area where you can select your pre saved Sender ID’s.
Usual Sender ID’s are company names, you can use up to 11 characters which includes spaces. Others will have their Sender ID as a mobile number which recipients can reply to.
Tracking your campaign with delivery reporting
Our system will default every campaign sent with a unique number so you can track it and check out its delivery reporting. This number is found on the right at the top, just underneath your Sender ID.
You can also change this number to a more memorable label if you wish, to make it easier to find in your delivery reports.
Schedule send your campaign for a certain date and time
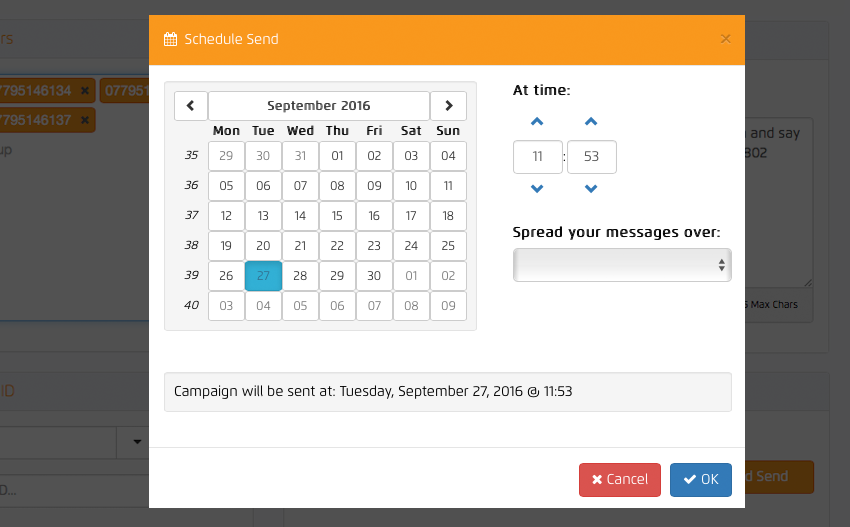
If you have a particular day and time you wanted your campaign to be sent out, then you can simply schedule your send and our system will do it all for you.
In the middle you will see the button ‘Schedule Send’, simply click that and a little pop up calender will appear with and area to type in your desired time. Simply choose your date and time, then sit back and relax.
Remember that when you schedule your message, it will be scheduled for the time that is set on your computer. So if you are in another country and want to send your UK customers a message at 11am, then you will need to work out the time difference and schedule it for then. An example would be if you were in France, and wanted to send to UK customers at 11am you would schedule your message for 12pm.
Shorten your URL links
You can paste links into your messages to direct your customers to particular websites and pages. However sometimes this links can very long and may look messy, but not with our URL shortener.
If you copy and paste the URL of the desired web page link that you want into your message. You will then see a button on the left become visible, URL Shorten. Simply click this and it will shorten your URL in the message, and it’s as simple as that.
Also to track the click through rate of your messages – they will need to be shortened.

