In our last post we showed you some of the great and very basic features in Message Box to save you time and make your mobile marketing experience as simple and as profitable as it can be.
In this instalment we have some great little features that should help you organise and mange your account, messages and time effectively.
Schedule Send
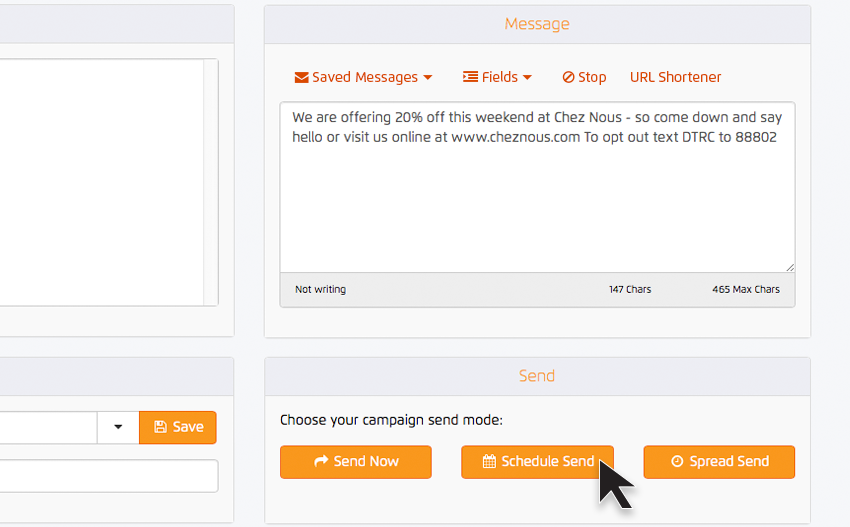
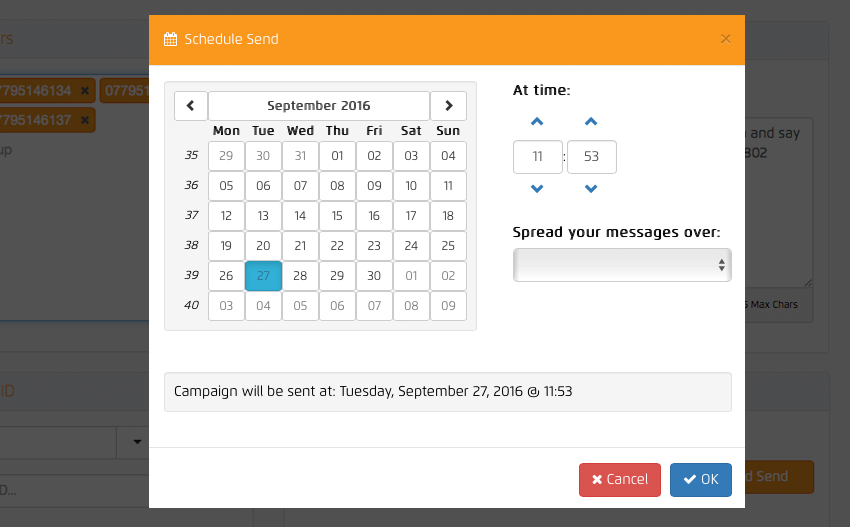
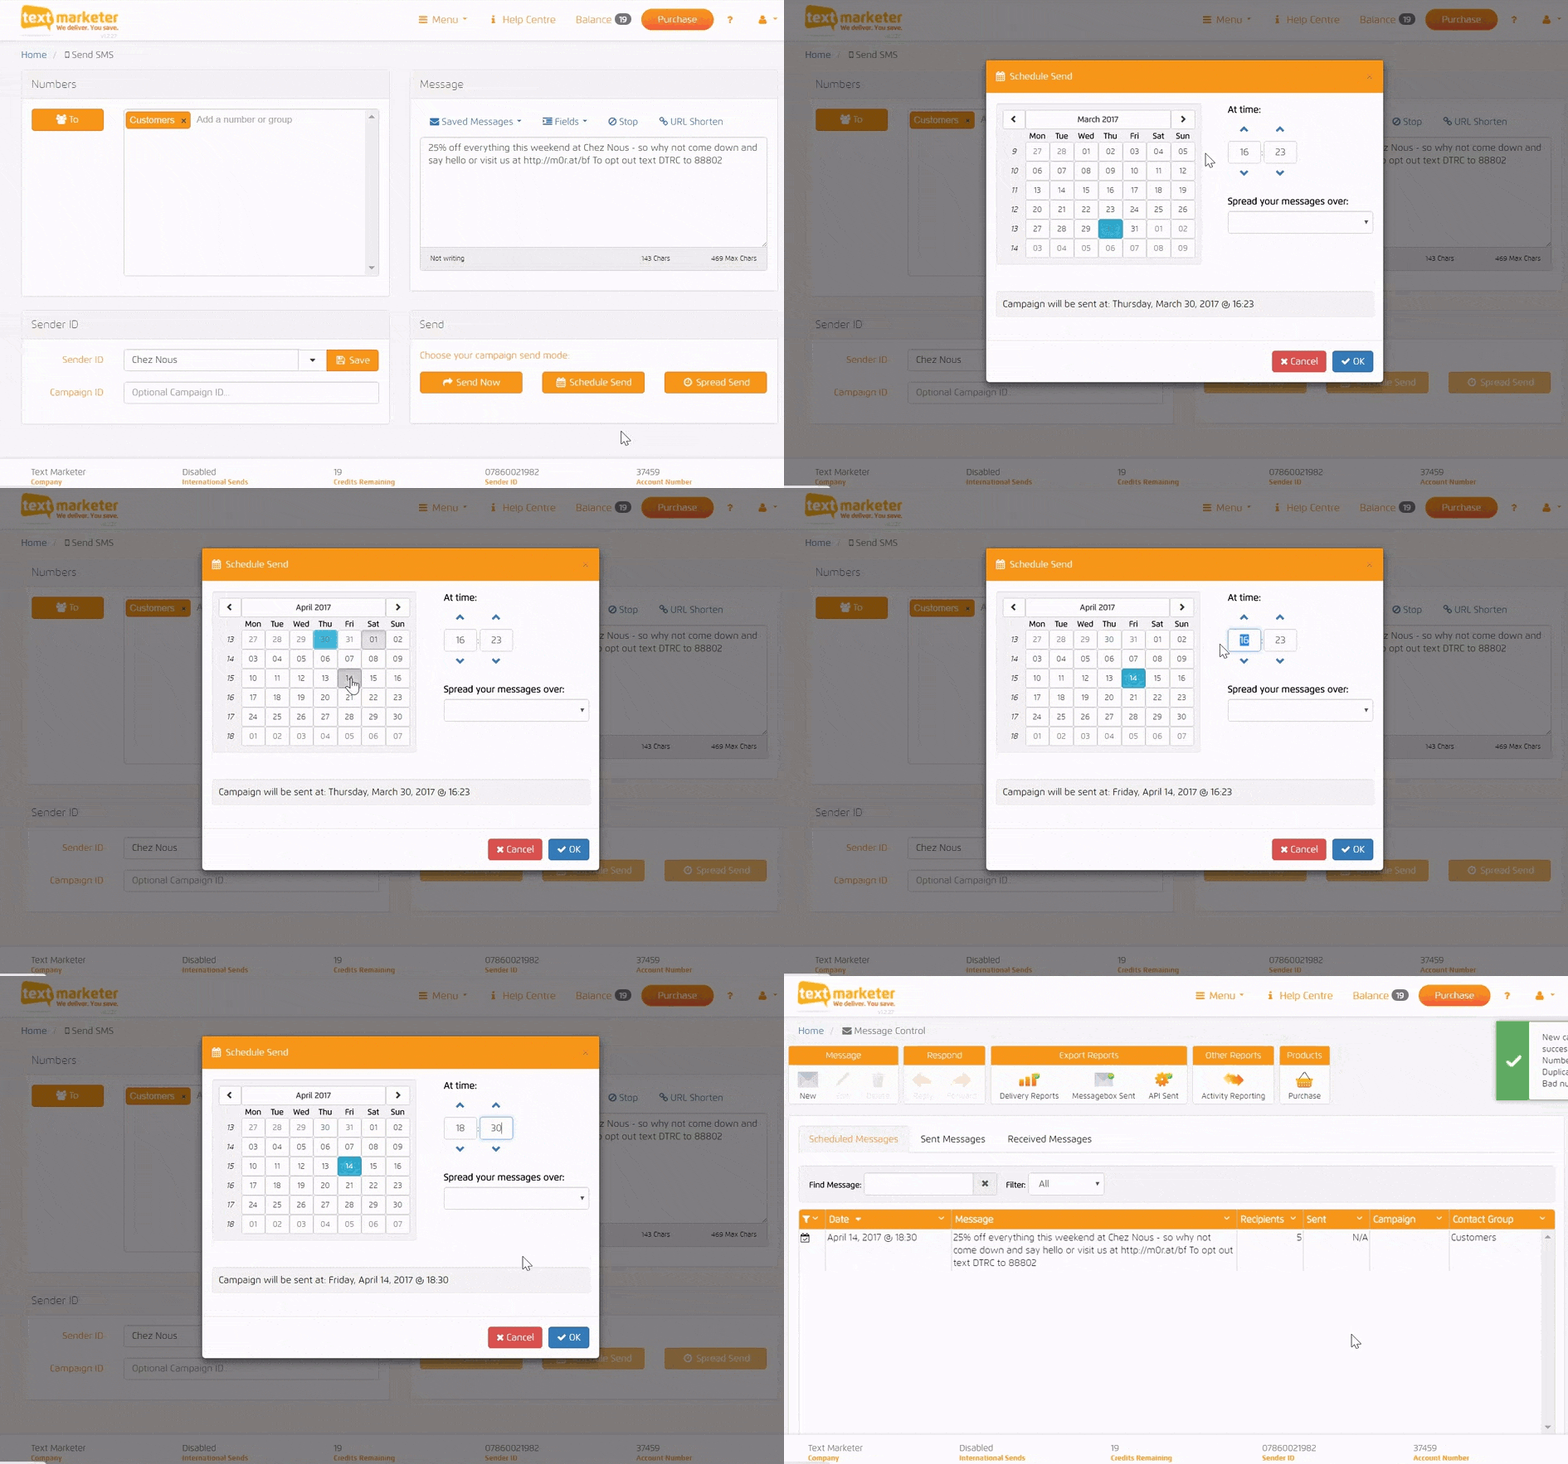
If you are going to be out of the office you can schedule your messages to be sent at any particular time or date that you wish.
Simply click on the ‘Schedule Send’ button like in the top image and then the little pop window will appear as shown above – select your date and time and press send!
Message Library
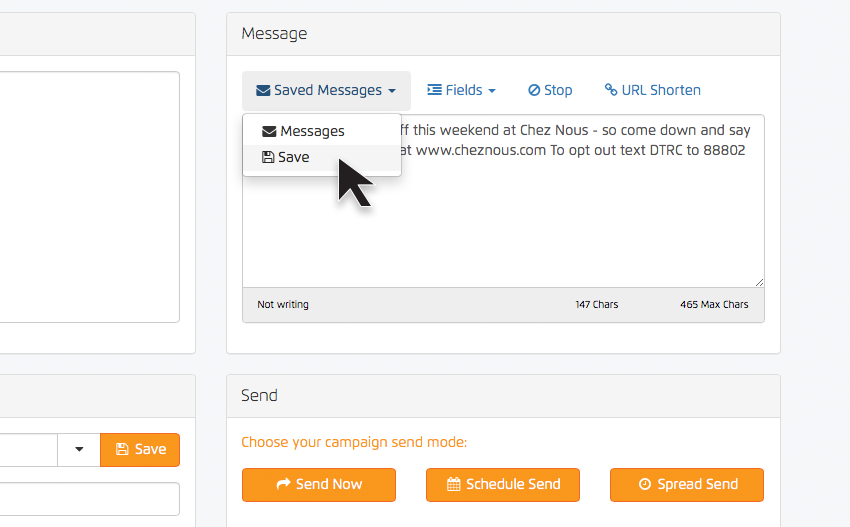
Create a library of your message templates for quick and easy use.
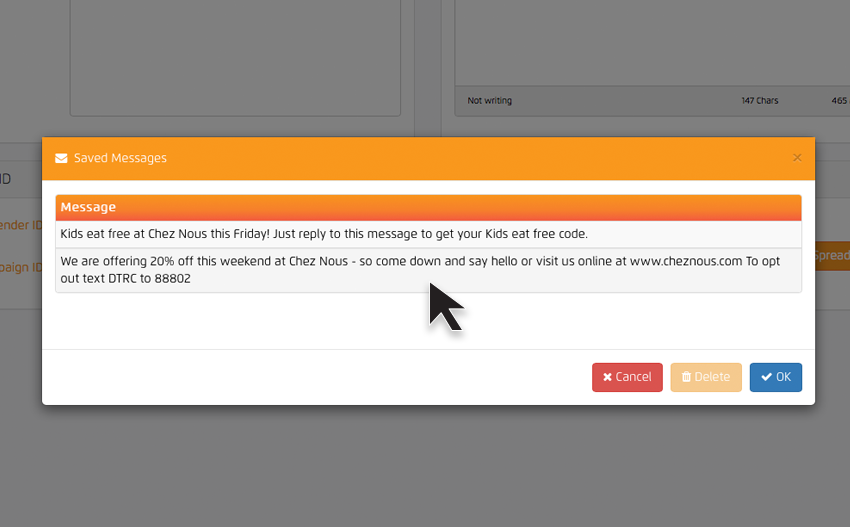
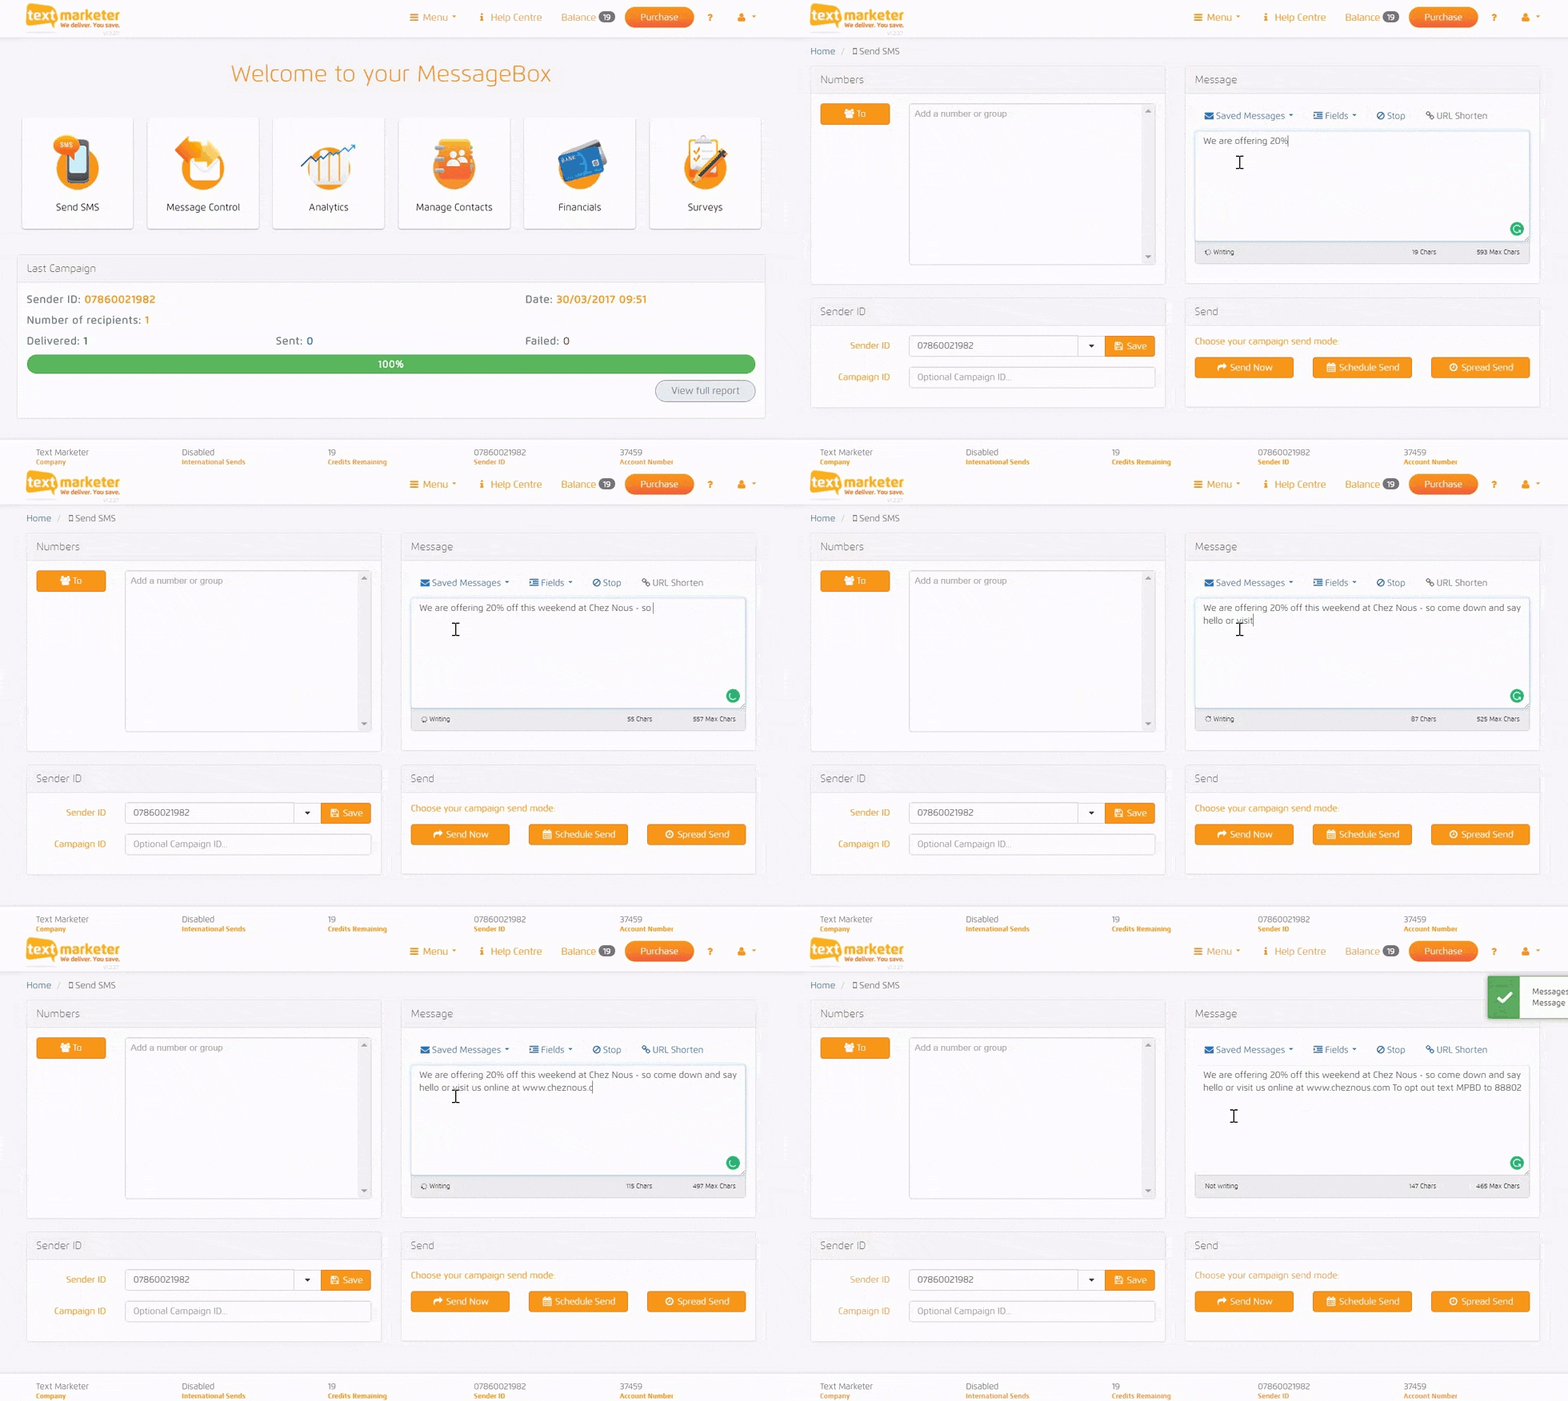
Simply write your message and the click the ‘Saved Messages’ dropdown as shown in the image at the top – then when you want to select a saved message, simple click on the ‘Message’ button on the left as shown above, and all your saved messages will pop in a little window.
Auto Response
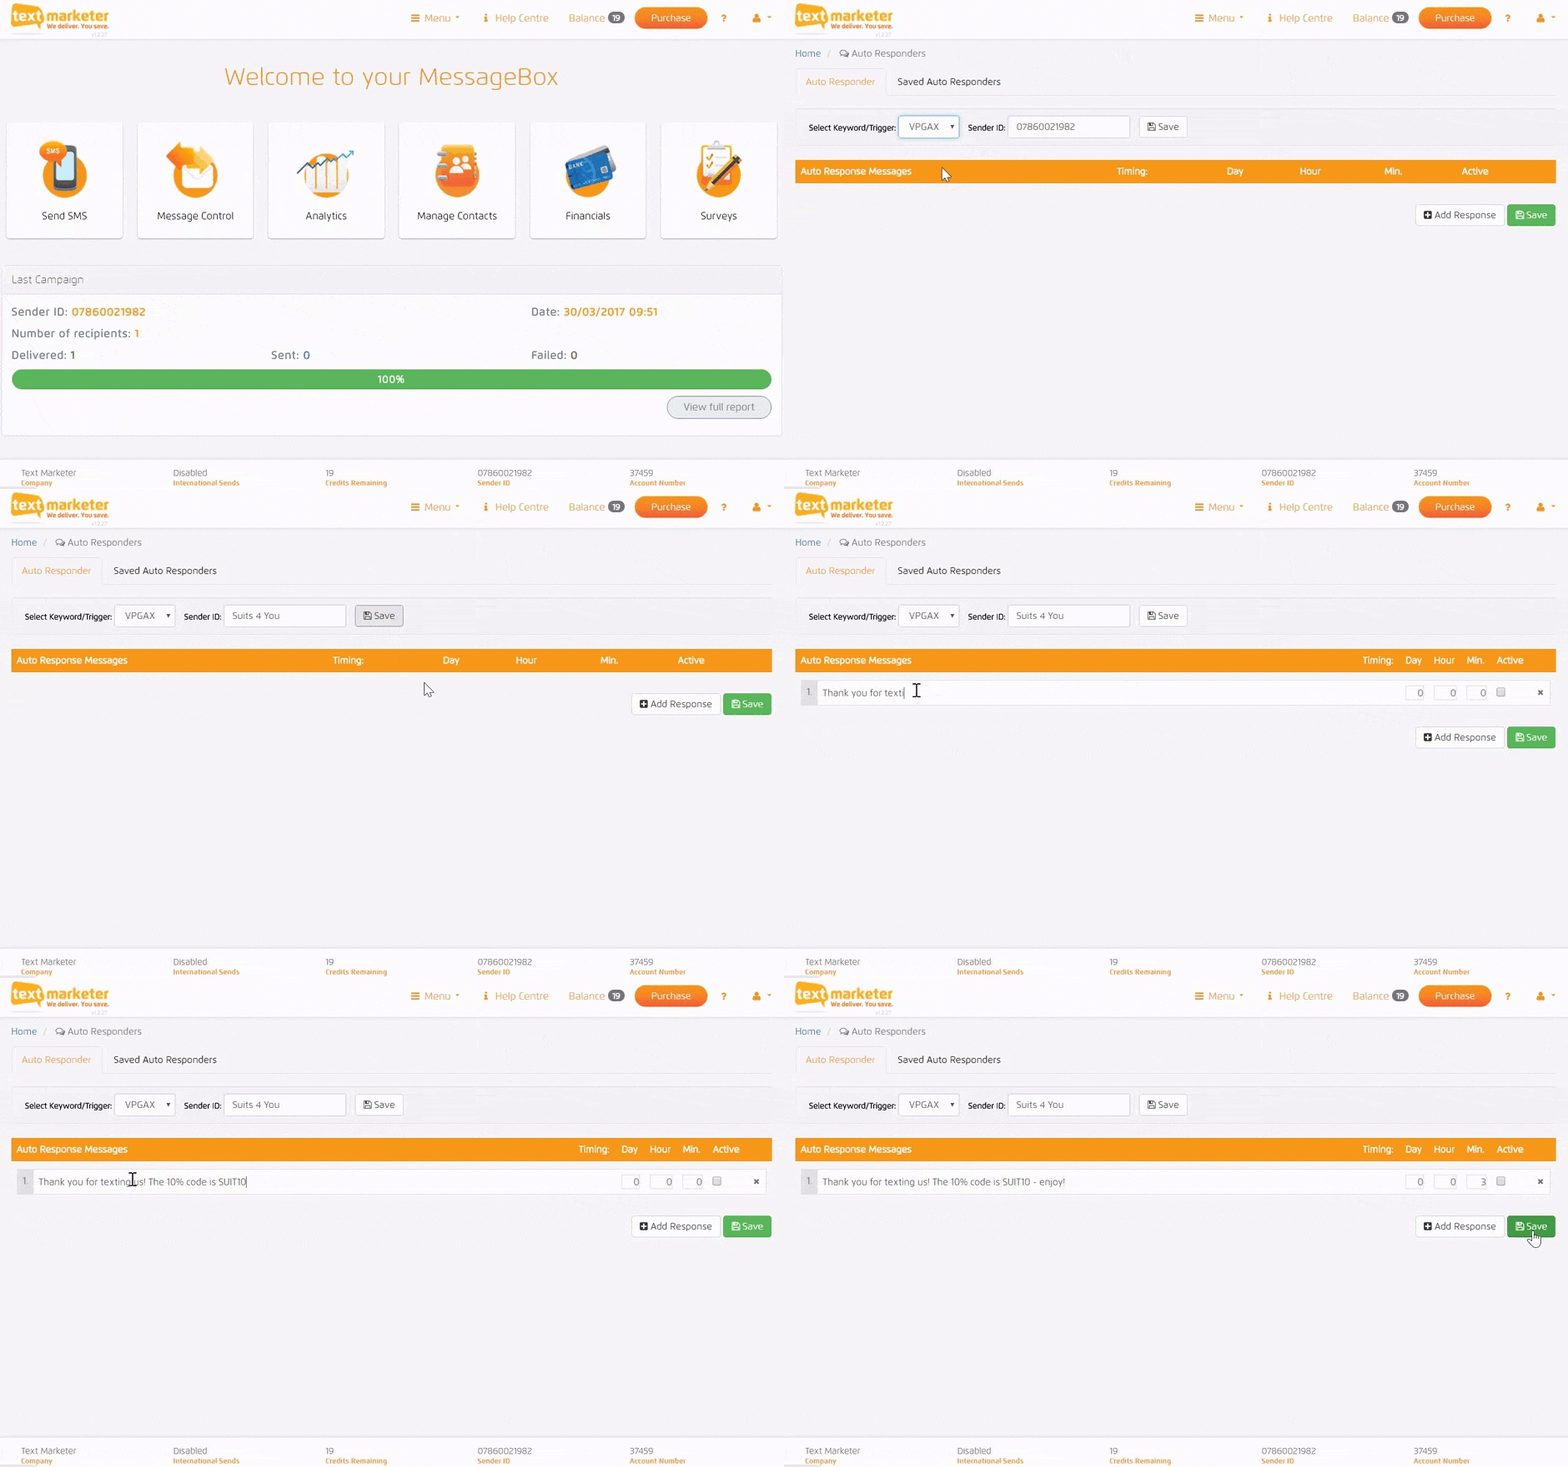
You can easily set-up auto responders in your account so that you don’t have to waste time going through all your replies and responding.
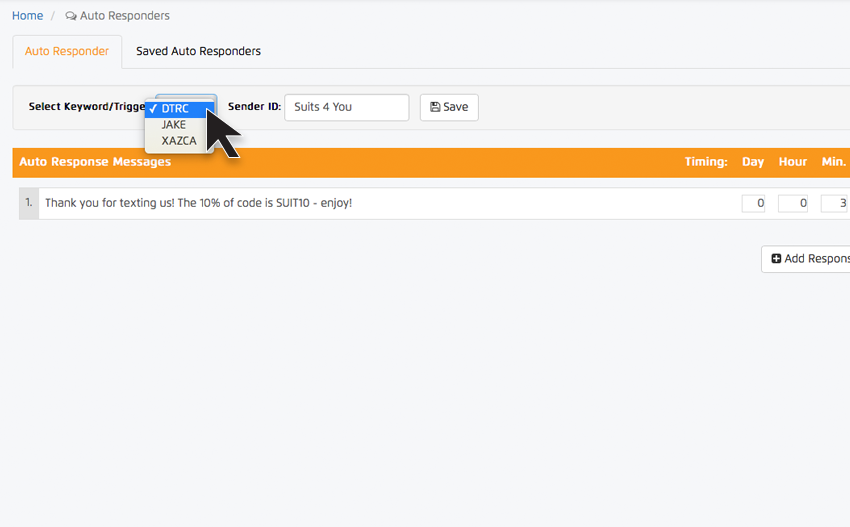
Simply select your keyword you would like your autoresponders to be associated from the Select keyword/Trigger dropdown in the toolbar above. Remember to type in your chosen Sender ID and click the ‘Save’ button at the end.
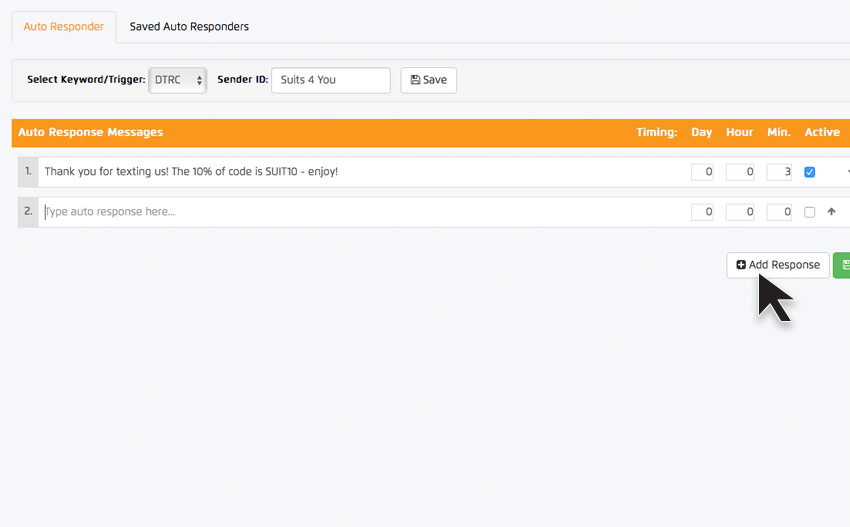
Now for the auto response messages, click the ‘Add response’ button in the bottom right, this will enable you to type in the message that you want to be sent out when someone texts in your keyword.
Type in your message, select how long after their message you want to send the auto respond – then click ‘Active’ and then ‘Save’.
You can add as many auto responder messages as you wish, just remember to put yourself in your customers shoes and think about the message you are sending.
Manage Opt Outs
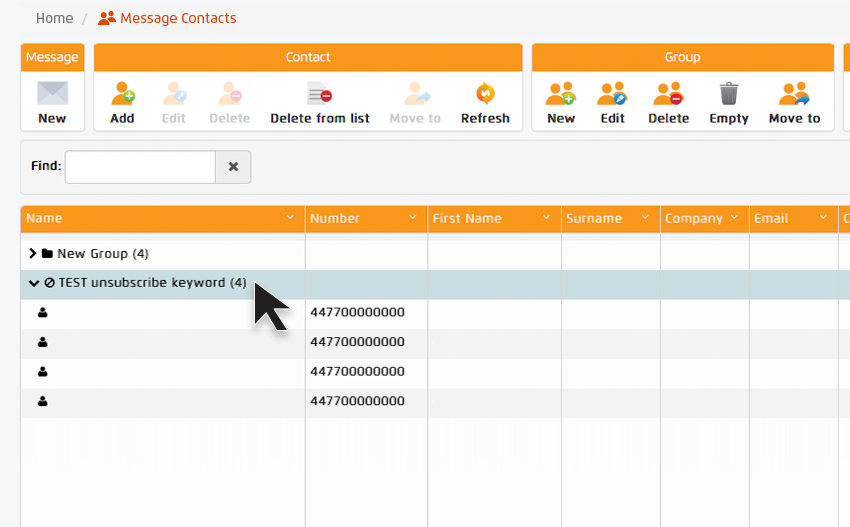
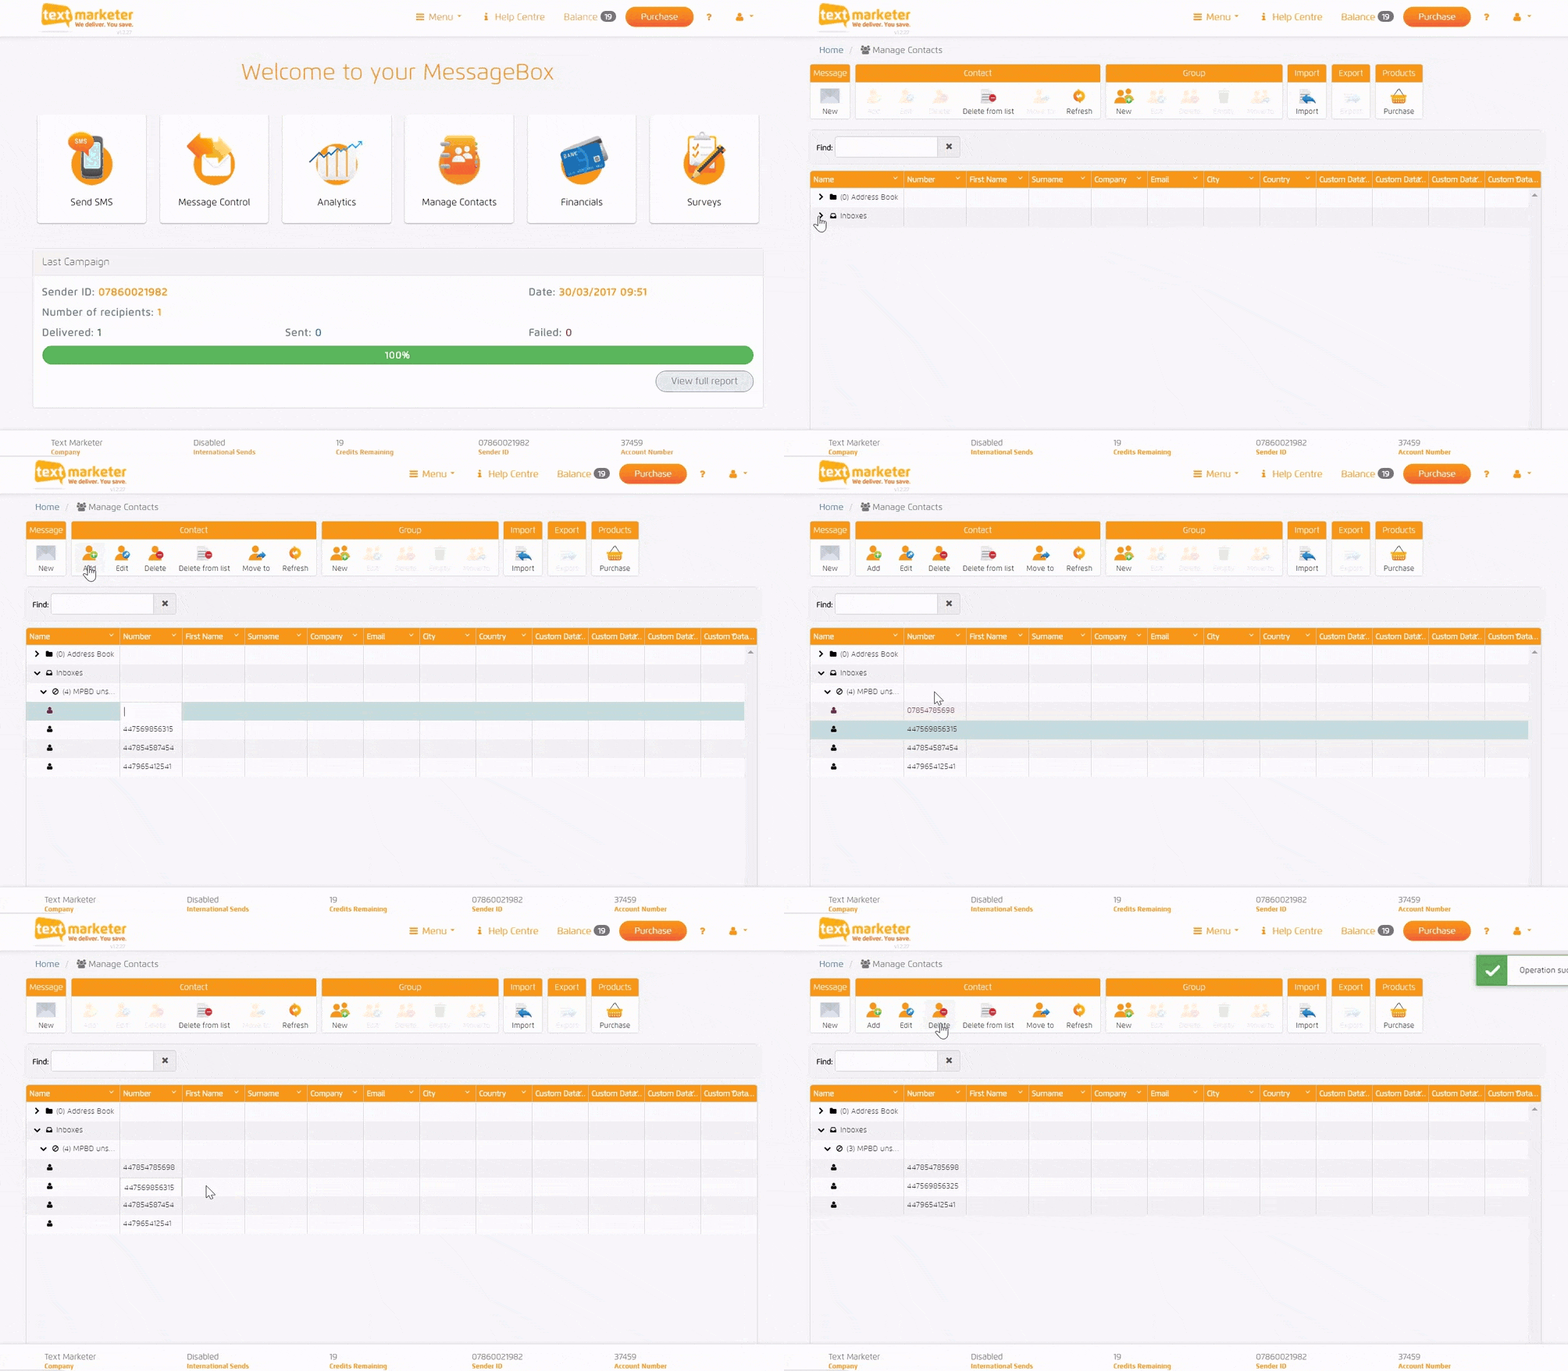
All your opt outs will be stored in a separate folder where you can add, delete and edit of them.
In your manage contacts you will see the dropdown labeled ‘Inboxes’ and in that folder you have your unsubscribe keyword folder – highlighted here above.
In the toolbar shown above you can add numbers manually to the list and delete or edit you need to.
In the message control section of Message Box you can export your list of unsubscribed numbers by selecting your unsubscribed keyword folder on the left and then clicking export in the toolbar.
We hope all these little neat features will help you to have an enjoyable stress free and most of all successful mobile marketing venture.

