Managing and adding your contacts with Message Box is easy, and creating and editing your contact groups couldn’t be simpler.
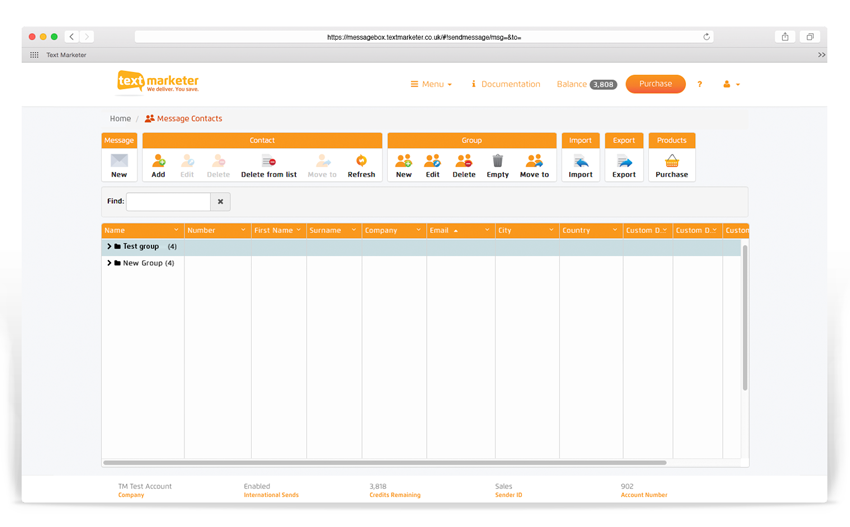
To start with you will need to set up an account. Then click on the ‘Manage Contacts’ button on the Message Box homepage, you will then arrive at the screen below.
Making a contact group
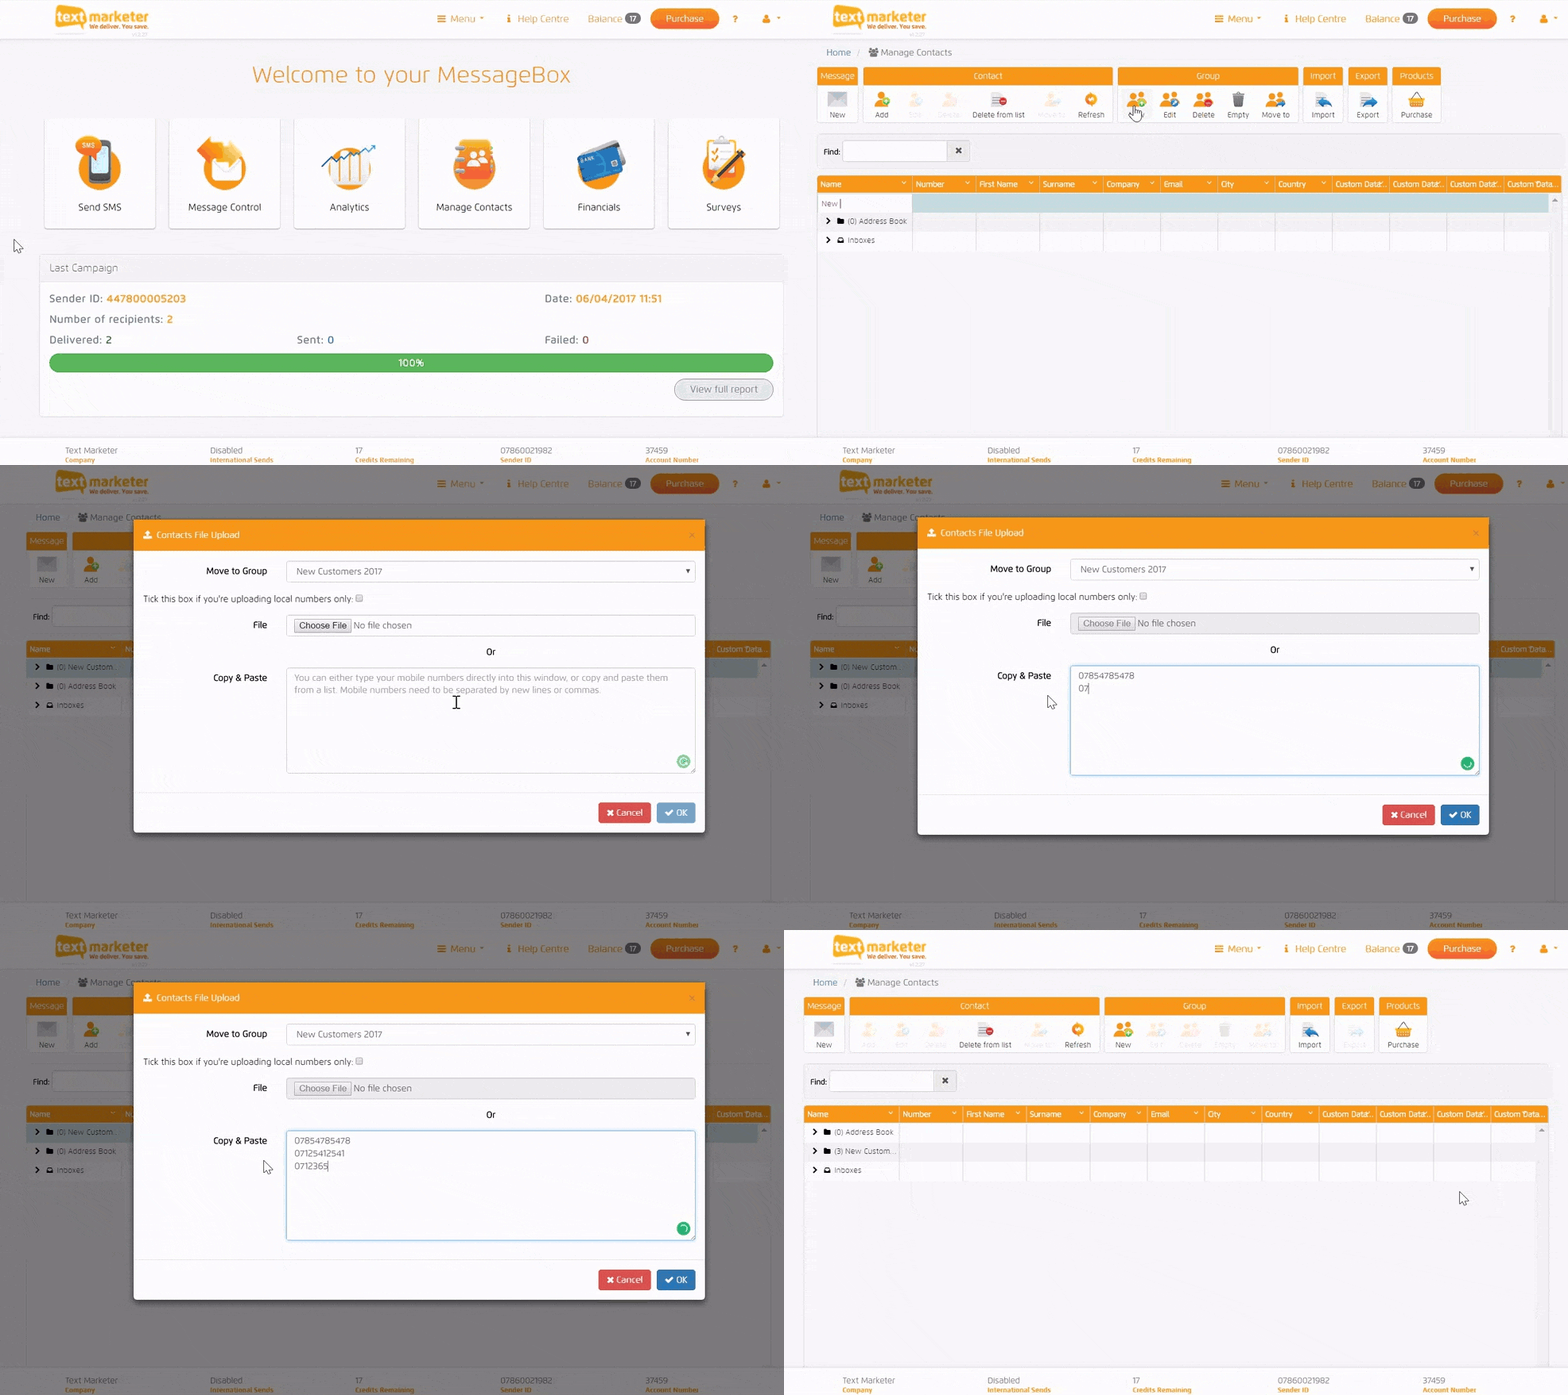
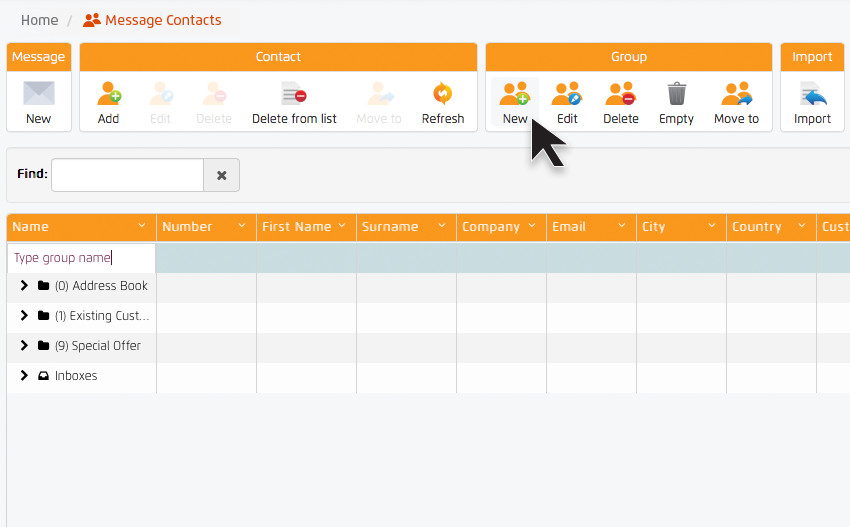
In the toolbar at the top of the page, you will see a section called ‘Group’ – simply click ‘New’
A new group will appear for you in the list where you can call your group whatever you like.
Hit return to save then name, and then a little pop-up will appear asking if you would like to add contacts to this group.
You can type your numbers directly into the box provided or copy and paste your numbers into it. You will need to make sure that the numbers are on separate lines or separated by a comma.
It also gives you the option to upload your contacts from a file.
Formatting your data ready for upload
Later versions of Excel may automatically save the Excel file as a .xlsx file. If this is the case, simply save your file as a .csv file by hitting the drop down arrow next to file type and select .csv.
When manipulating mobile numbers in Excel, the leading zero from your list of numbers is often deleted. If this happens, don’t worry, your account will automatically recognise that the zero is missing and replace it.
The following mobile number formats can be processed:
07900122321
447900122321
7900122321
+447900122321
Adding your contacts from Excel, text, or CSV files
Adding contacts from Excel, text, or CSV files is easy.
Simply select the contact group you would like to add the files to, then click the ‘Import’ button in the above toolbar. Select ‘Browse’ and select the file that you wish to upload and press ‘Ok’.
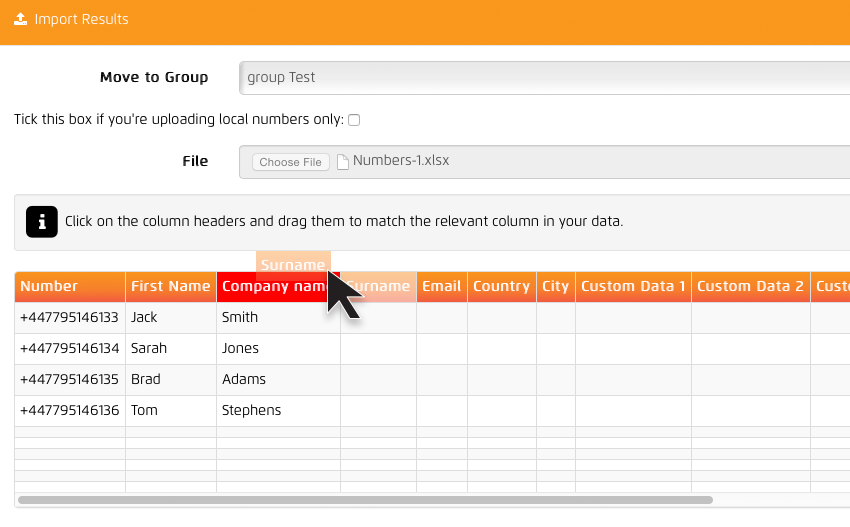
Your data will then be populated in a table.
You might see that some data is under the wrong heading, for example, our data has the ‘Surnames’ written under the heading of ‘Company’. We can simply click on the required heading and drag and drop it, on the heading we want it to replace.
Adding a new contact
Simply click on the group you want the contact to be added to, and click ‘Add’ in the toolbar above. Then simply click the required fields and type in their details.
Importing contacts from Google, Mailchimp, Capsule, Dotmailer and others
Importing your contacts couldn’t be simpler.
Just click on the ‘Import Your Data’ button in the top toolbar, and select your desired upload.
Re-arranging contacts in groups
You can now simply drag and drop contacts into other groups.
Click on the contact that you want to move into another group, and drag and drop into your chosen folder.
Editing and deleting your contacts
Editing and deleting contacts couldn’t be easier.
Select the contact you wish to edit/delete then click on the appropriate button above in the toolbar.
Editing or deleting your groups
To edit or delete your group, click on the group and then click the required button in the above toolbar.
Exporting your contact groups
You can export your contact groups and all their details.
Click on the group you wish to export then click the ‘Export’ button in the toolbar above. This will give several options of file preference.


